P5JS Tutorial
This tutorial is made for people with 0 knowledge of generative art. It was made to be your first steps into P5js.
In addition to this tutorial, you can join our discord and ask your questions, don't be shy, everyone will help you.
Art Editor
You can start your NFA journey at https://editor.p5js.org
It's a free online p5js editor that will work to render almost every code you can make.
Preview

Starting
The two core functions of P5JS are setup() and draw().
setup()
This function is called once when the program starts. It's used to define initial environment properties such as screen size and background color and to load media such as images and fonts as the program starts. There can only be one setup() function for each program and it shouldn't be called again after its initial execution.
WARNING
Variables declared within setup() are not accessible within other functions, including draw().
draw()
Called directly after setup(), the draw() function continuously executes the lines of code contained inside its block until the program is stopped or noLoop() is called.
Creating a canvas
To start your art, you need to make a canvas element using createCanvas() inside setup()
Let's start creating a 400x400 canvas
function setup() {
  createCanvas(400, 400)
}
Preview

Info
The preview will not render anything because we haven't drawn anything yet, we just created our canvas
Changing background color
Let's color this canvas with a bright color, how about pink? Let's use background() inside the setup.
But first, this function needs to receive a color as a parameter, the color will be interpreted as a CSS Color, so RGB, RGBA, HSL, HSLA, hex, and named color strings are supported.
In this tutorial I will be using RGB.
function setup() {
  createCanvas(400, 400)
  background(255, 150, 197)
}
Preview

Creating Objects
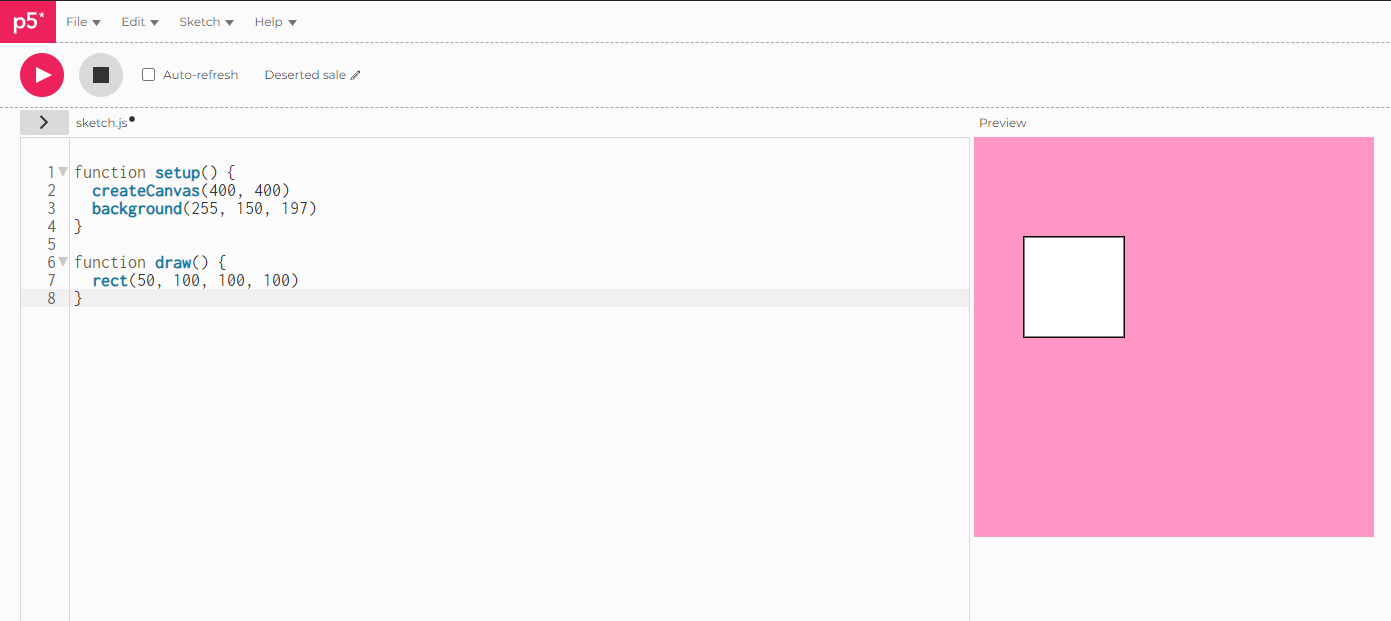
Now let's start bringing our art to life, for this we will draw a rectangle using rect().
By default rect() accepts 4 parameters (x, y, w, h).
The first two parameters set the location of the rectangle's upper-left corner.
The third and fourth set the shape's the width and height, respectively.
So lets draw a rectangle that upper-left corner starts at x: 50, y: 100 and is 100 high and 100 wide.
function setup() {
  createCanvas(400, 400)
  background(255, 150, 197)
}

function draw() {
  rect(50, 100, 100, 100)
}
Preview

Filling the shapes
As you can see in the previous preview, we drew a white rectangle with a black outline.
But we don't define any color, how can we, for example, draw the rectangle with the color green?
For this we need to use fill() which receives a color parameter equal to the background()
TIP
All shapes drawn after the fill() command will be filled with the color
Let's fill the rectangle with green.
function setup() {
  createCanvas(400, 400)
  background(255, 150, 197)
}

function draw() {
  fill(0, 255, 0) // Set the color
  rect(50, 100, 100, 100) // Draw the rectangle with the color
}
Preview

Adding a new object
Let's make a circle now?
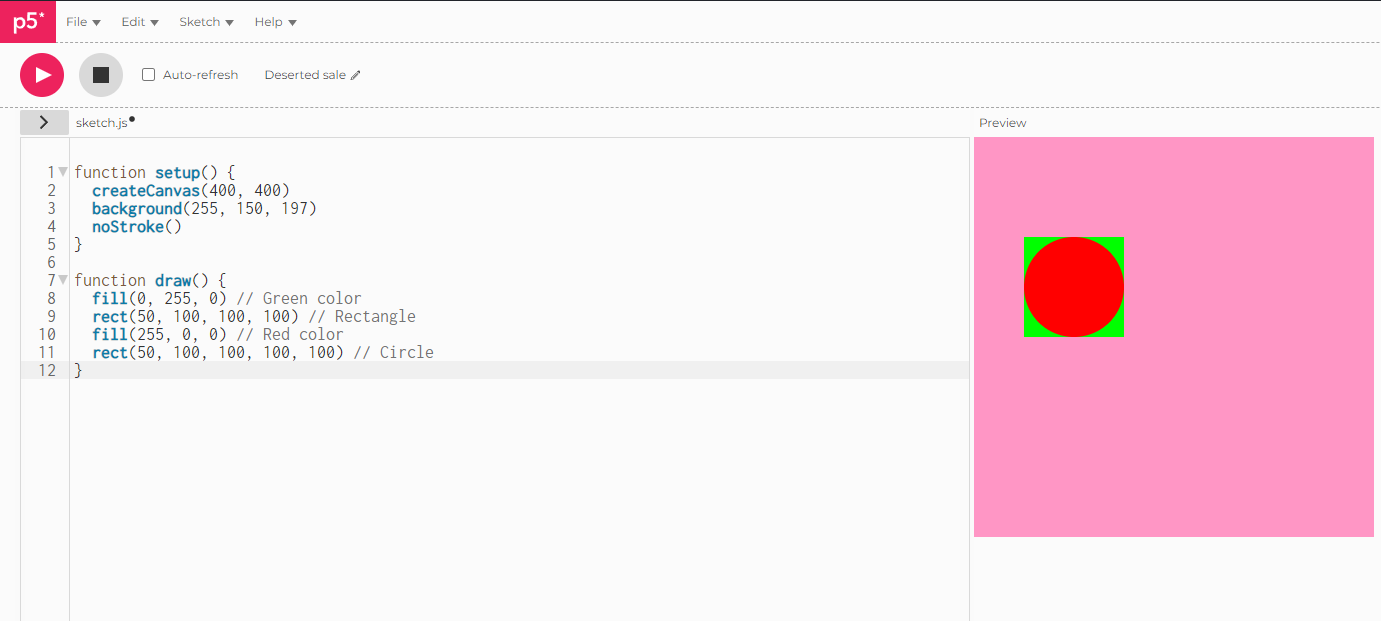
To draw a circle you need to specify five parameters on rect(), the fifth parameter is used as the radius value for all four corners.
Add a fill(255, 0, 0) to color circle with the red color
So lets draw a rectangle circle that upper-left 'corner' starts at x: 50, y: 100 and is 100 high and 100 wide and have 100 radius.
function setup() {
  createCanvas(400, 400)
  background(255, 150, 197)
}

function draw() {
  fill(0, 255, 0) // Green color
  rect(50, 100, 100, 100) // Rectangle
  fill(255, 0, 0) // Red color
  rect(50, 100, 100, 100, 100) // Circle
}
Preview

Removing the Stroke
Let's remove the stroke on our drawing using noStroke() on setup() to make it cleaner.
function setup() {
  createCanvas(400, 400)
  background(255, 150, 197)
  noStroke()
}

function draw() {
  fill(0, 255, 0) // Green color
  rect(50, 100, 100, 100) // Rectangle
  fill(255, 0, 0) // Red color
  rect(50, 100, 100, 100, 100) // Circle
}
Preview

Considerations
You can keep changing and playing with the code as much as you want.
Don't be shy if you think what you made is too simple. Everyone starts simple until they can make more complex stuff.
Useful links:

